Calling Auth0 Secured APIs with Kreya

Securing your APIs with Auth0 is a smart move for production, but it often adds extra steps to the development and testing cycle. No one wants to spend their afternoon manually swapping expired tokens.
In this post, we'll show you how to use Kreya to automate the entire Auth0 handshake, allowing you to call secured endpoints effortlessly.
Setting up authentication in Kreya
One of the major benefits of Kreya is that authentication is built into the core of the app. Instead of manually adding headers to every request, you define an authentication configuration once and reuse it throughout your project.
Navigate in Kreya to the Project menu and select Authentications (or use the shortcut Ctrl+⇧+a).
The configuration in Kreya depends on the type of Auth0 Application you are using.
Get your Auth0 credentials
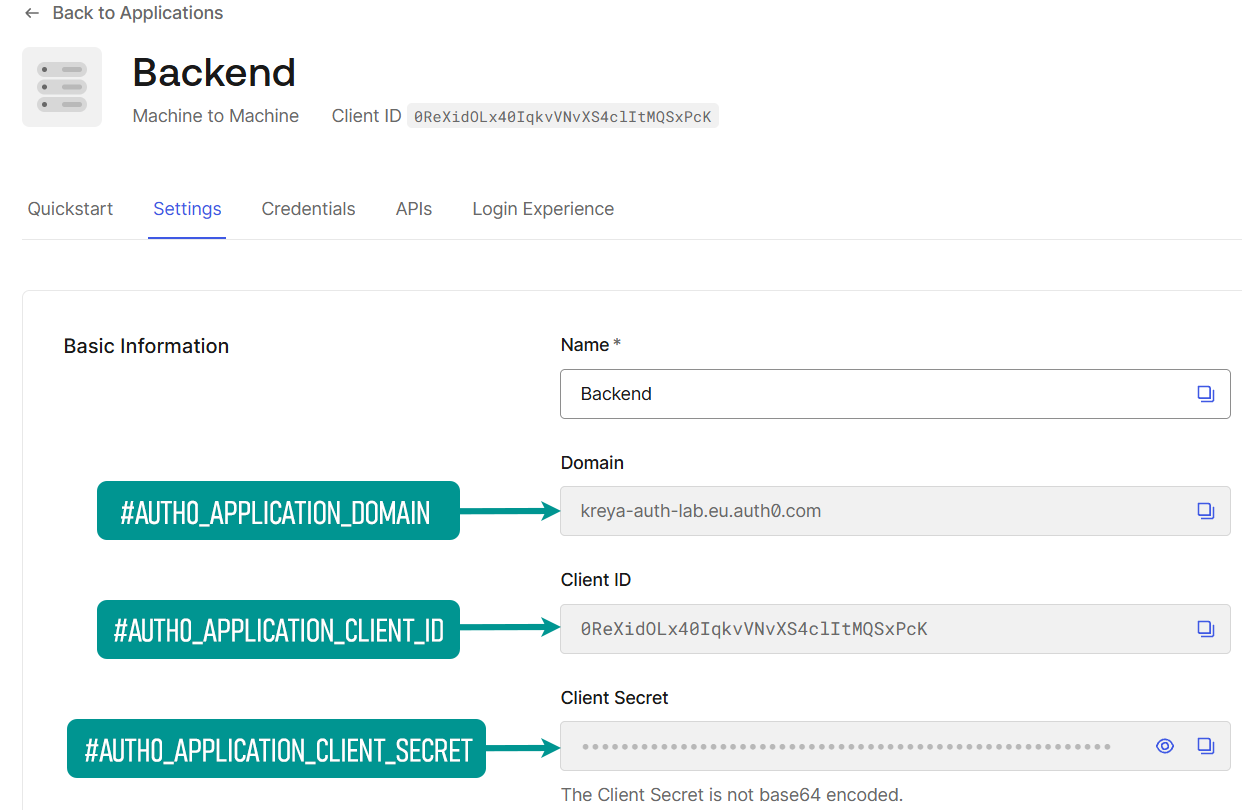
To configure the authentication in Kreya, you need to gather specific values from the Auth0 dashboard. You need values from your Application settings (who is asking for the token) and your API settings (what the token is for).
For the Application values, navigate in the Auth0 dashboard to Applications > Applications in the left-hand menu and select the application. This applies to all applications regardless of the type.
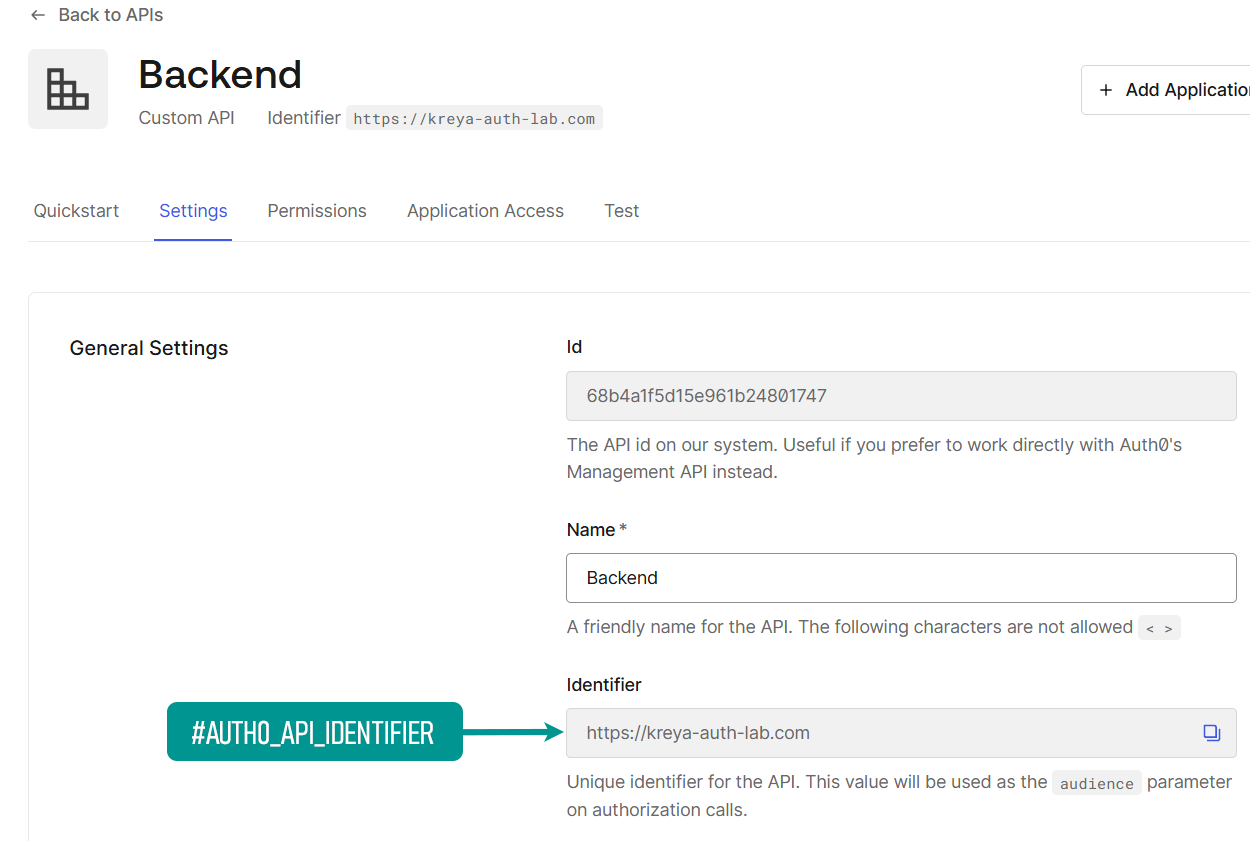
To get the audience value for your auth configuration, navigate in the Auth0 dashboard to Applications > APIs and select your API.
Machine to machine application (M2M)
This is used, if your API is being called by another backend service or a background worker. You don't require a user login with this type of application.
| Property | Value |
|---|---|
| Type | OAuth2 / OpenID-Connect |
| Grant type | Client credentials |
| Issuer | #AUTH0_APPLICATION_DOMAIN (can be found in the Auth0 application settings) |
| Client Authorize Method | Basic |
| Client-ID | #AUTH0_APPLICATION_CLIENT_ID (can be found in the Auth0 application settings) |
| Client-Secret | #AUTH0_APPLICATION_CLIENT_SECRET (can be found in the Auth0 application settings) |
| Token-Type to authorize on APIs | Access-Token |
| Additional token parameters | Key = audience, Value = #AUTH0_API_IDENTIFIER (can be found in the Auth0 Api Settings) |
It should look similar to this:
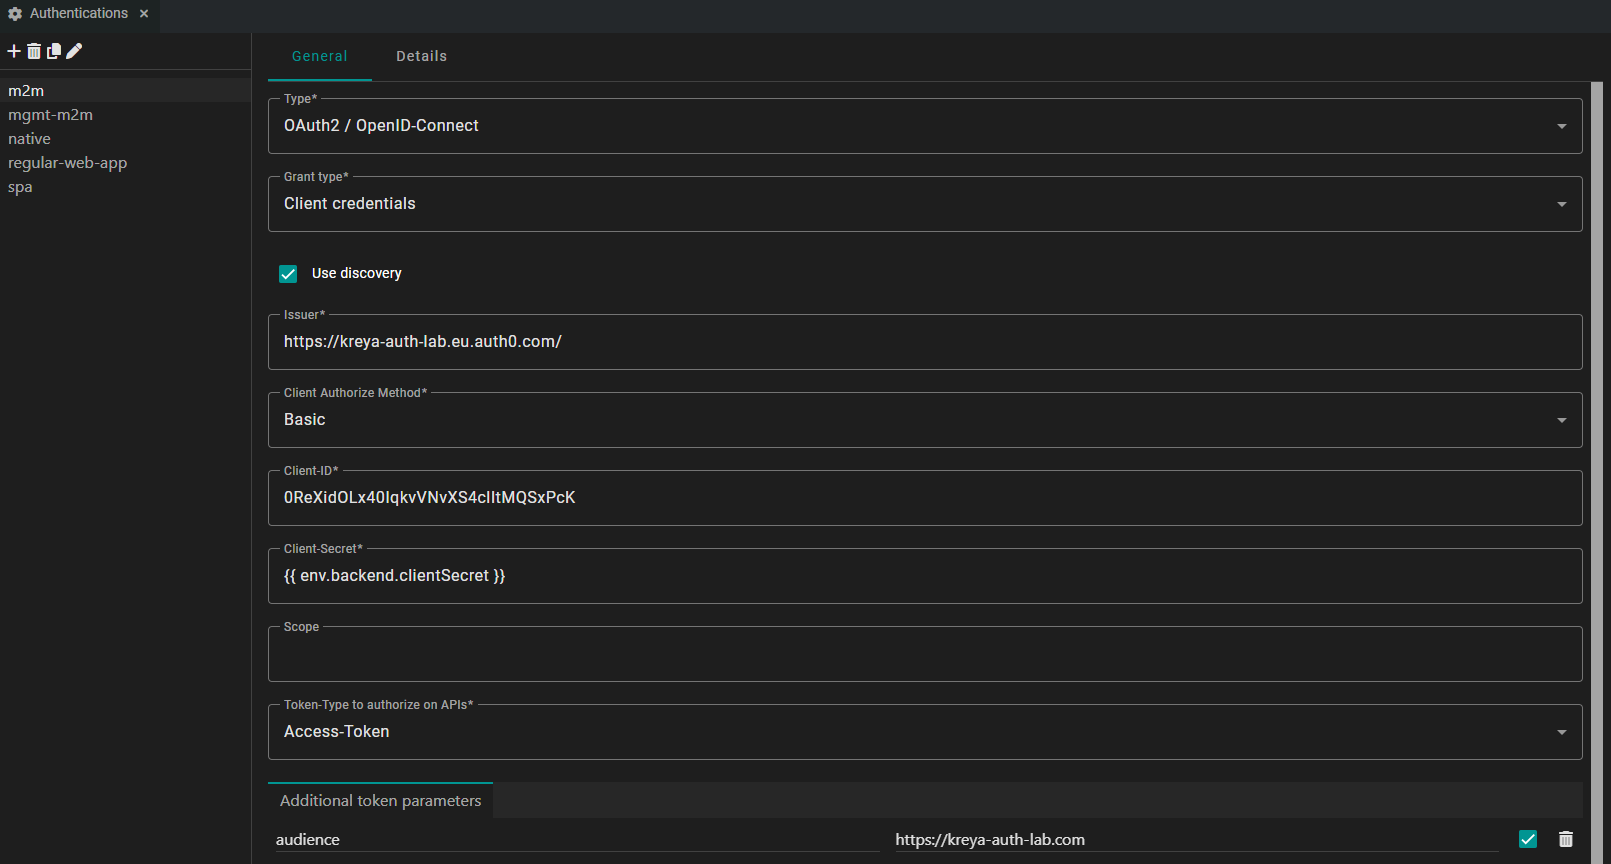
You may have noticed that we use the environment variable
{{ env.backend.clientSecret }} instead of inserting a raw value for the client secret.
This is a security best practice that prevents sensitive credentials from being accidentally committed to version control or shared with team members who shouldn't have access to it.
Single-page application
If you are developing a web frontend, which is built with Angular or React, you likely have a single-page application (SPA) set up in Auth0. SPAs are considered public clients, because they cannot securely store a client secret.
By using the Authorization Code flow, Kreya allows you to simulate a user's login eperience exactly as it would happen in your web app.
| Property | Value |
|---|---|
| Type | OAuth2 / OpenID-Connect |
| Grant type | Authorization code |
| Issuer | #AUTH0_APPLICATION_DOMAIN (can be found in the Auth0 application settings) |
| Client Authorize Method | None |
| Client-ID | #AUTH0_APPLICATION_CLIENT_ID (can be found in the Auth0 application settings) |
| Use native browser | Check (optional) |
| Scope | Example: openid profile email |
| Token-Type to authorize on APIs | Access-Token |
| Additional login parameters | Key = audience, Value = #AUTH0_API_IDENTIFIER (can be found in the Auth0 Api Settings) |
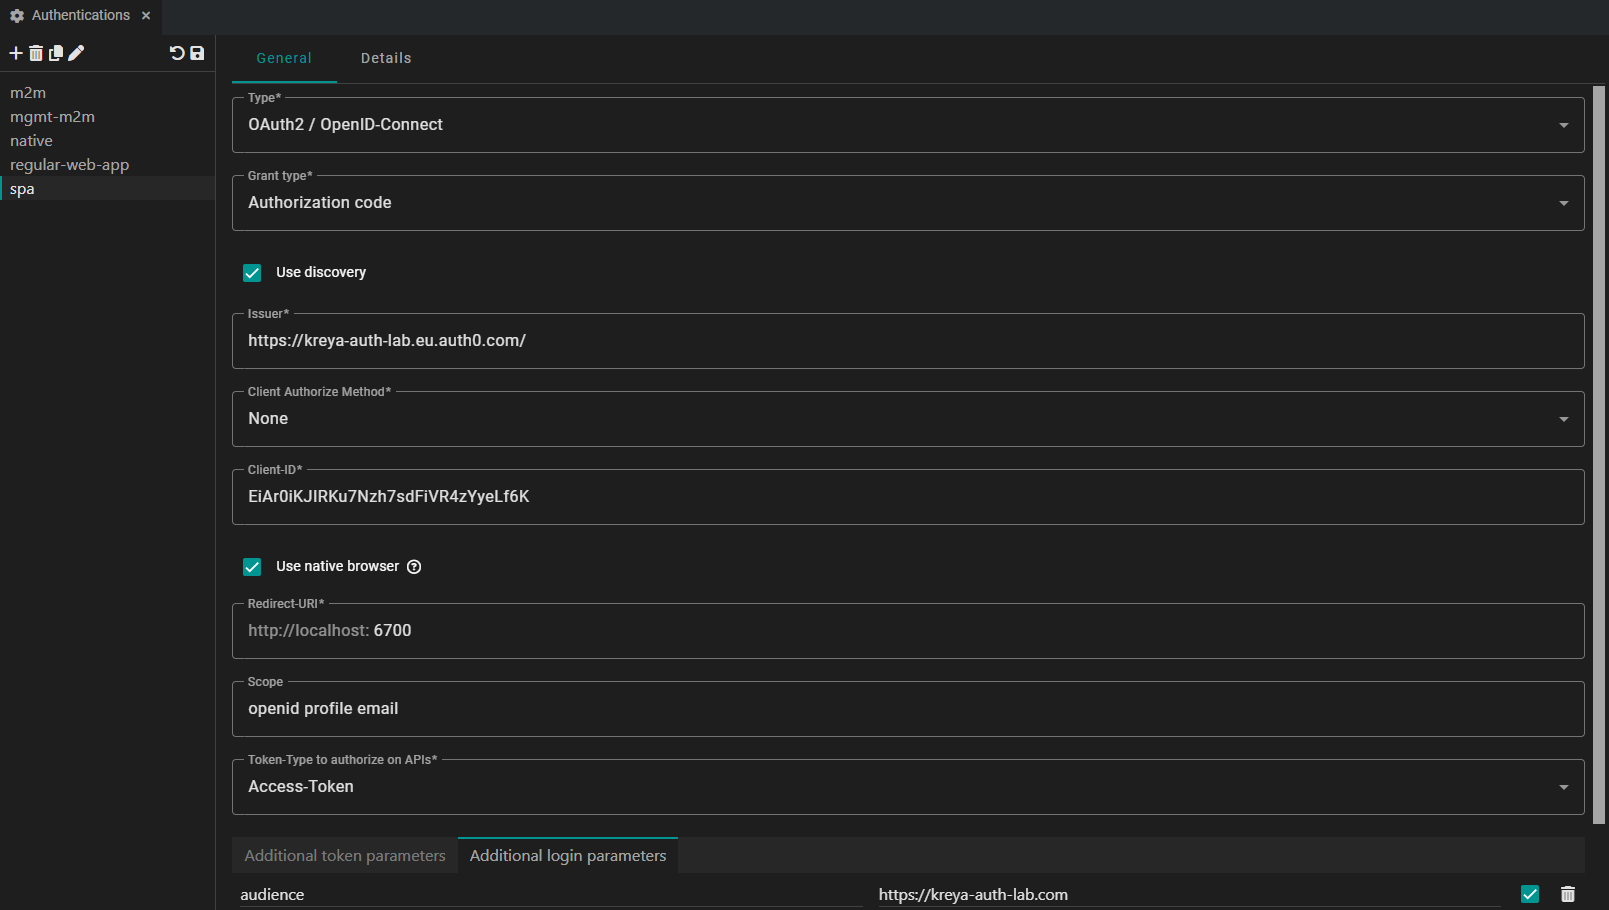
We use the native browser to redirect the login. When Kreya attempts to authenticate, it will open your native browser (where you have access to locally stored credentials).
On redirect flows, ensure that the Kreya Redirect-URI is added in the Allowed Callback URLs in the corresponding Auth0 application.
Native application
If you are building a mobile or desktop application, you likely have a native application set up in Auth0 which uses the Authorization Code with PKCE flow.
In Kreya, the configuration for a native application is identical to the SPA setup. Kreya automically manages the PKCE handshake under the hood.
| Property | Value |
|---|---|
| Type | OAuth2 / OpenID-Connect |
| Grant type | Authorization code |
| Issuer | #AUTH0_APPLICATION_DOMAIN (can be found in the Auth0 application settings) |
| Client Authorize Method | None |
| Client-ID | #AUTH0_APPLICATION_CLIENT_ID (can be found in the Auth0 application settings) |
| Use native browser | Check (optional) |
| Scope | Example: openid profile email |
| Token-Type to authorize on APIs | Access-Token |
| Additional login parameters | Key = audience, Value = #AUTH0_API_IDENTIFIER (can be found in the Auth0 Api Settings) |
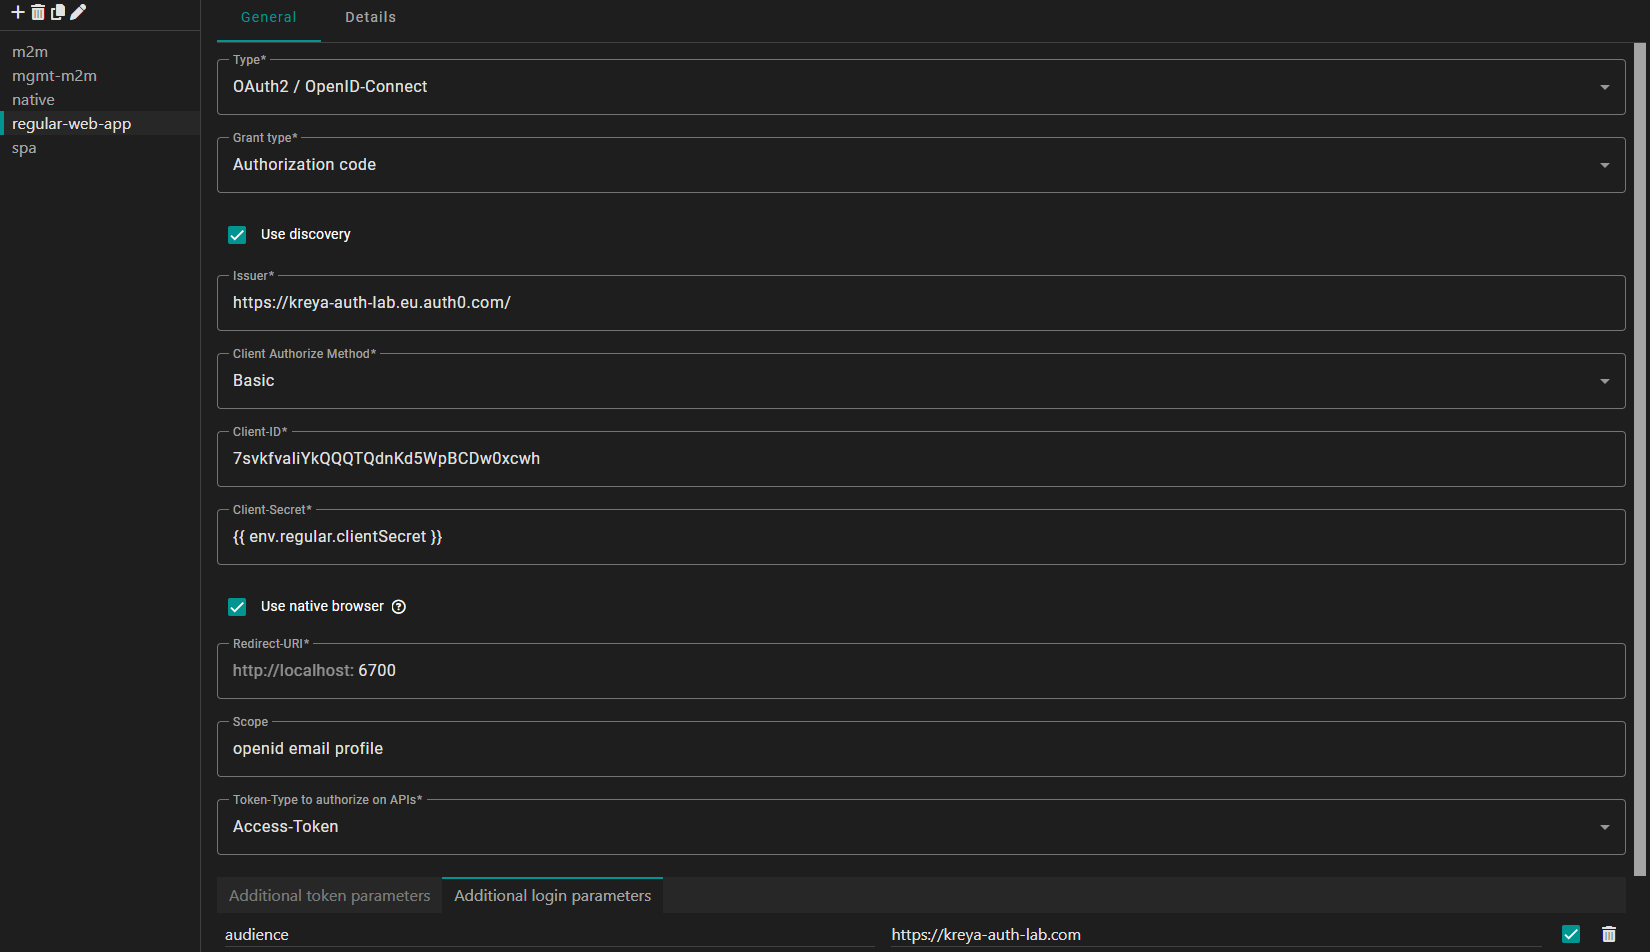
Regular web application
Unlike SPAs or native apps, a regular web application is considered a confidential client, because it runs on a server you control, allowing it to securely store a client secret.
In Kreya, this setup uses the Authorization Code flow. While it looks similar to the SPA setup, we need to provide the client secret and change the Client Authorize Method. This ensures that Kreya authenticates itself to Auth0 using your application's credentials during the token exchange.
| Property | Value |
|---|---|
| Type | OAuth2 / OpenID-Connect |
| Grant type | Authorization code |
| Issuer | #AUTH0_APPLICATION_DOMAIN (can be found in the Auth0 application settings) |
| Client Authorize Method | Basic |
| Client-ID | #AUTH0_APPLICATION_CLIENT_ID (can be found in the Auth0 application settings) |
| Client-Secret | #AUTH0_APPLICATION_CLIENT_SECRET (can be found in the Auth0 application settings) |
| Use native browser | Check (optional) |
| Scope | Example: openid profile email |
| Token-Type to authorize on APIs | Access-Token |
| Additional login parameters | Key = audience, Value = #AUTH0_API_IDENTIFIER (can be found in the Auth0 Api Settings) |
Invoking the request
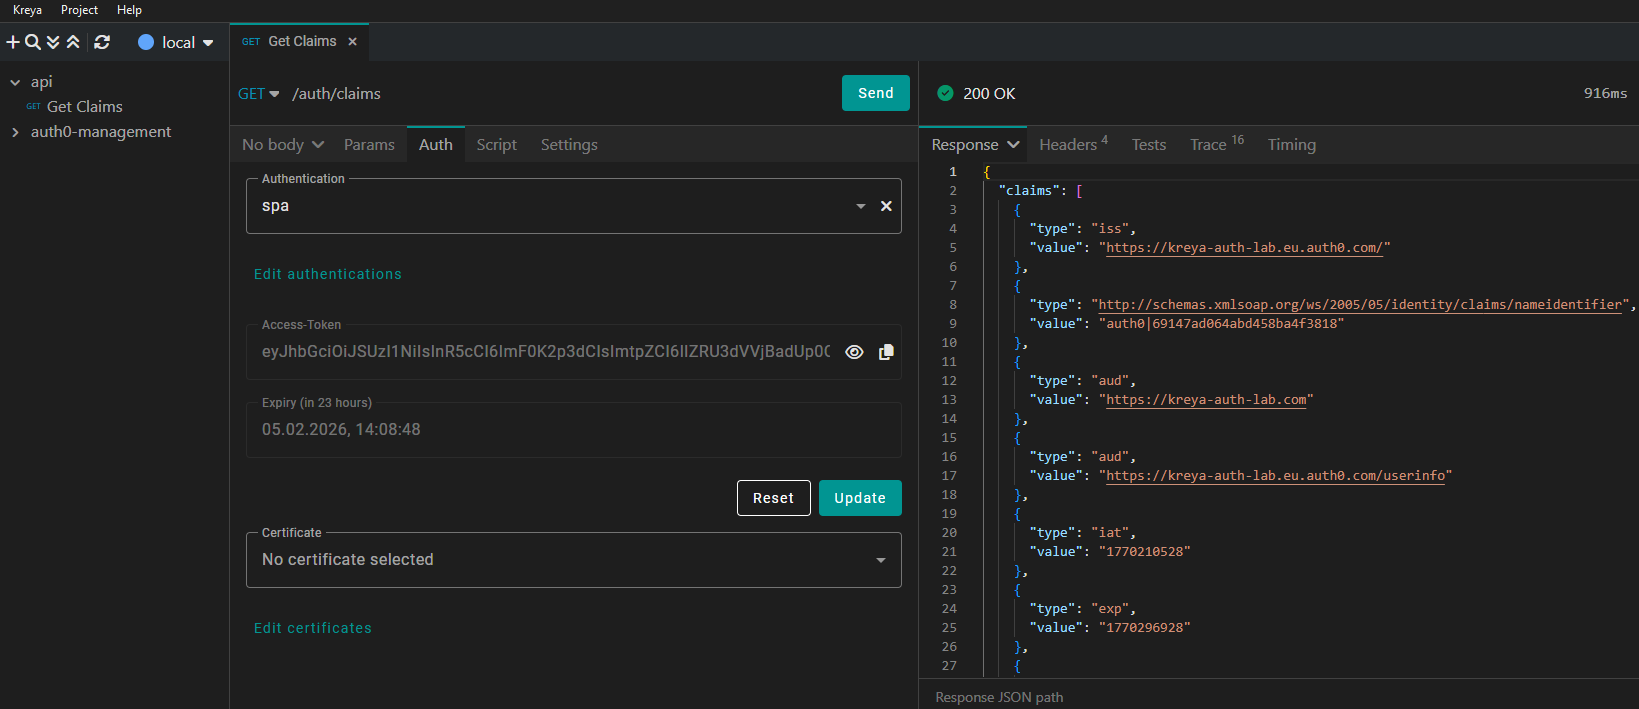
To use an authentication configuration in Kreya, go to the Auth tab and select the configuration.
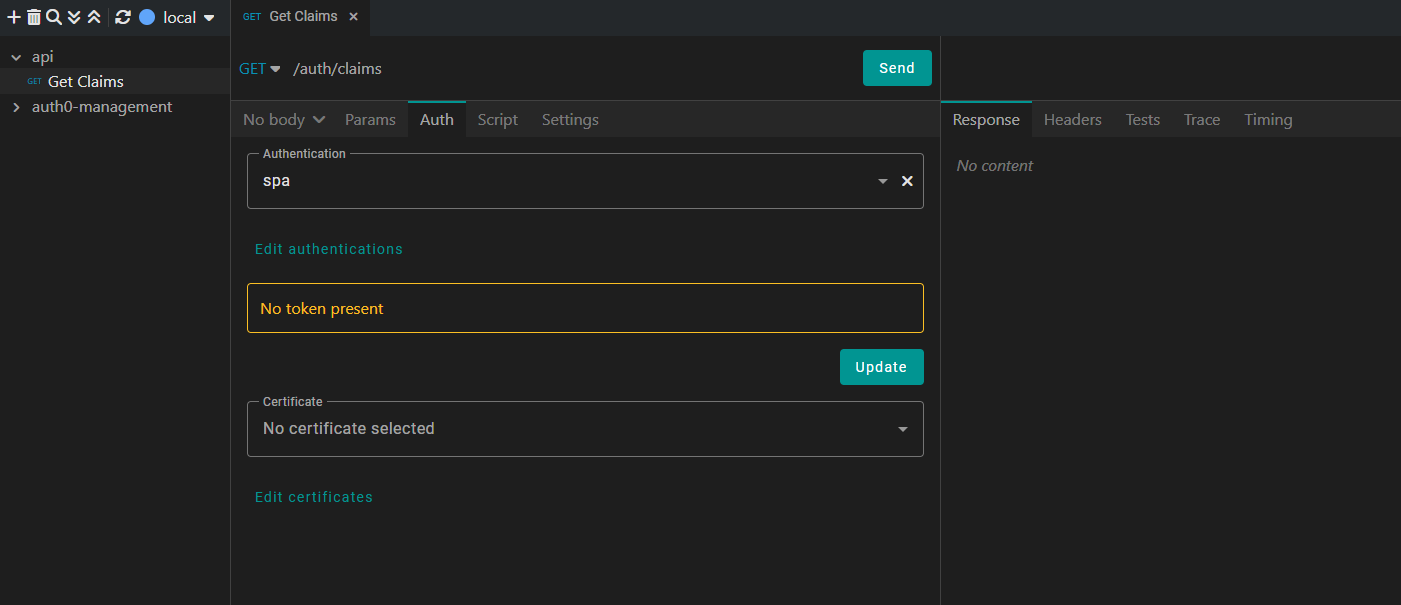
To explicitly get a new Access-Token click the Update Button. If no token is present, it will fetch one when we send the request.
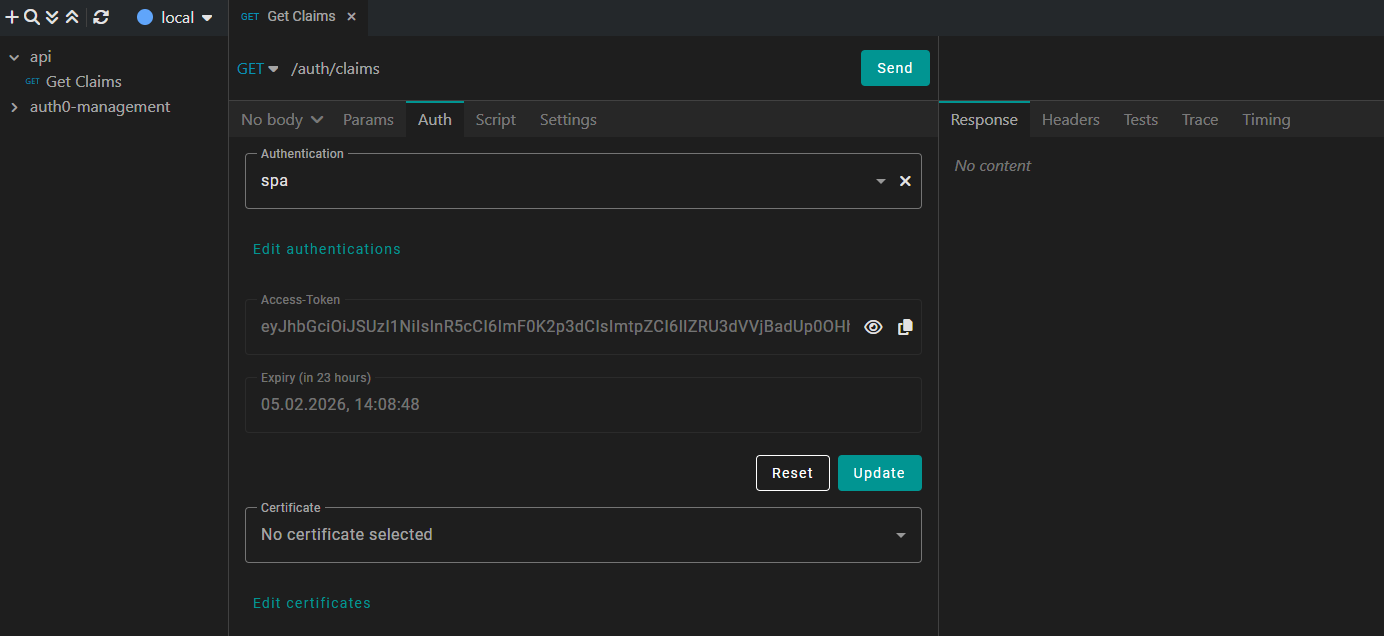
Depending on your authentication configuration, it will directly fetch the token or open your browser, where you can login with an authorized user.
If the retrieval is successful, Kreya displays the JWT and its expiry date directly in the UI. You don't need to re-authenticate for every request, Kreya caches the token and automatically includes it in the request.
You can click the icon to see the current JWT claims:
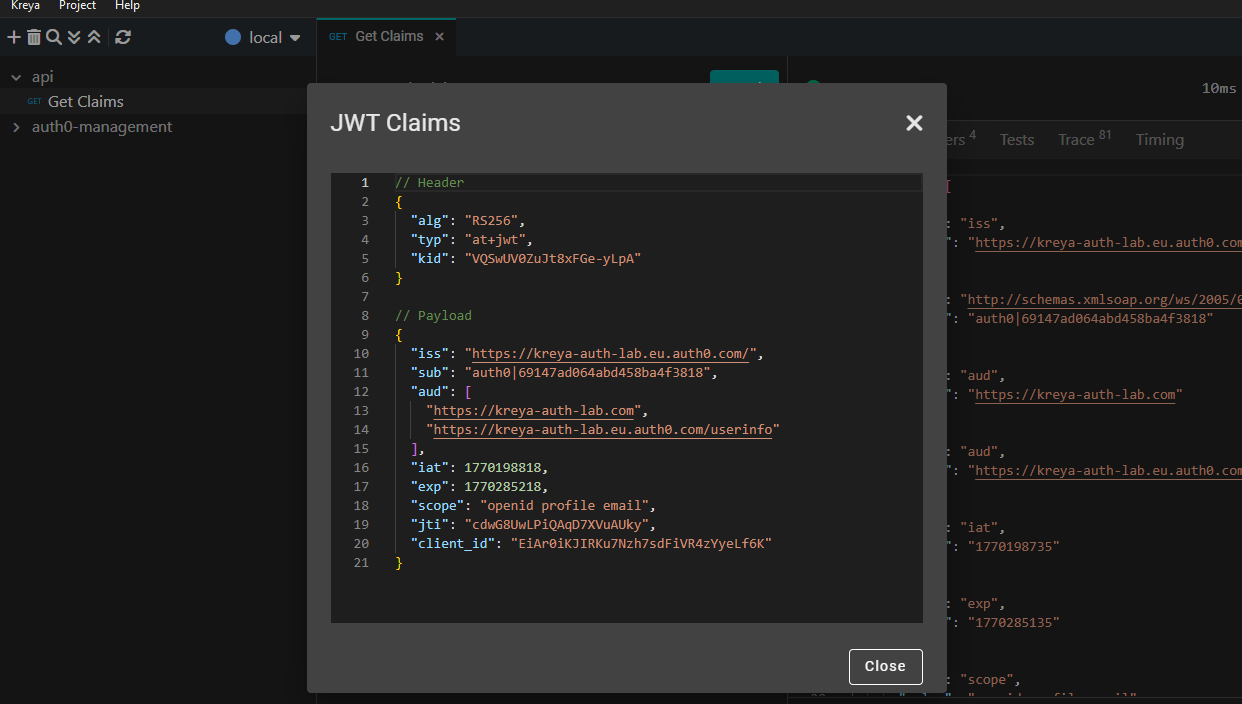
In this example, we are calling a local API, which reads all user claims of the authenticated user and returns it.
Pro tip: Set the auth per directory settings
Instead of manually assigning the authentication configuration to every single request, you can use Directory settings.
By setting the authentication at the directory level, all requests within that directory and its subdirectories will automatically inherit those credentials.

Conclusion
Testing secured APIs doesn't have to be a manual burden. By integrating Auth0 with Kreya, you can automate the complex OAuth2 handshakes and focus on what actually matters.
Whether you are working with machine-to-machine tasks or simulating complex single-page application user flows, Kreya's inheritance-based settings and automated token management make your development workflow faster and more secure.
Ready to try it out? Download Kreya today and start testing your secured endpoints.