How to call Google Cloud APIs with Kreya

In this post, we'll show you how to use Kreya to automate the Google Cloud authentication flow, allowing you to call Google Cloud Platform services effortlessly.
Setting up authentication in Kreya
One of the major benefits of Kreya is that authentication is built into the core of the app.
Instead of manually adding Authorization: Bearer ... headers to every request,
you define a Google Cloud authentication configuration once and reuse it throughout your project.
Navigate in Kreya to the Project menu and select Authentications (or use the shortcut Ctrl+⇧+a).
Google Cloud authentication types
Kreya supports different ways to authenticate against Google Cloud, depending on whether you are acting as a system (Service Account) or a developer (User).
Service Account Authentication
When you need to test with a specific set of permissions or simulate a backend-to-backend call, using a Service Account is the way to go.
If you don't have a service account yet, you can go to the Google Cloud Console, and navigate to IAM & Admin > Service Accounts (a project is required).
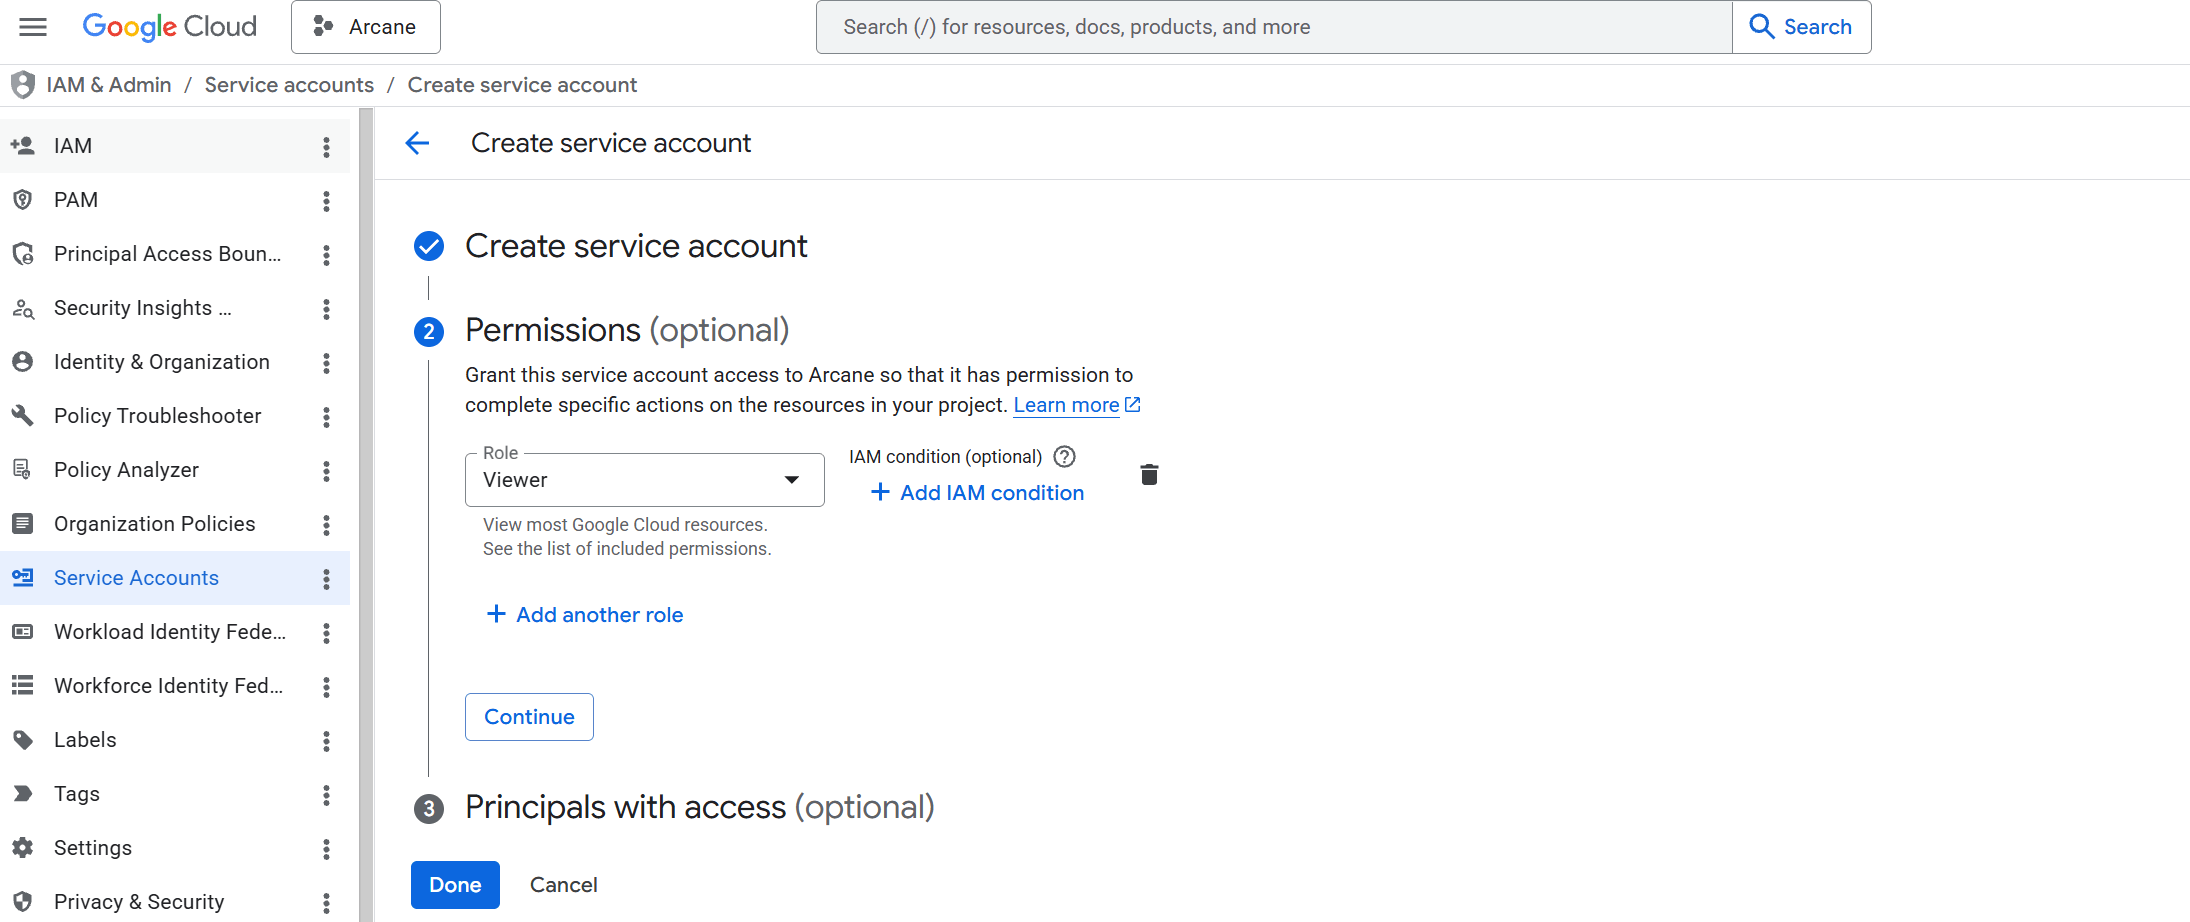
You can use an existing service account (which already has the necessary permissions), or create a new one.
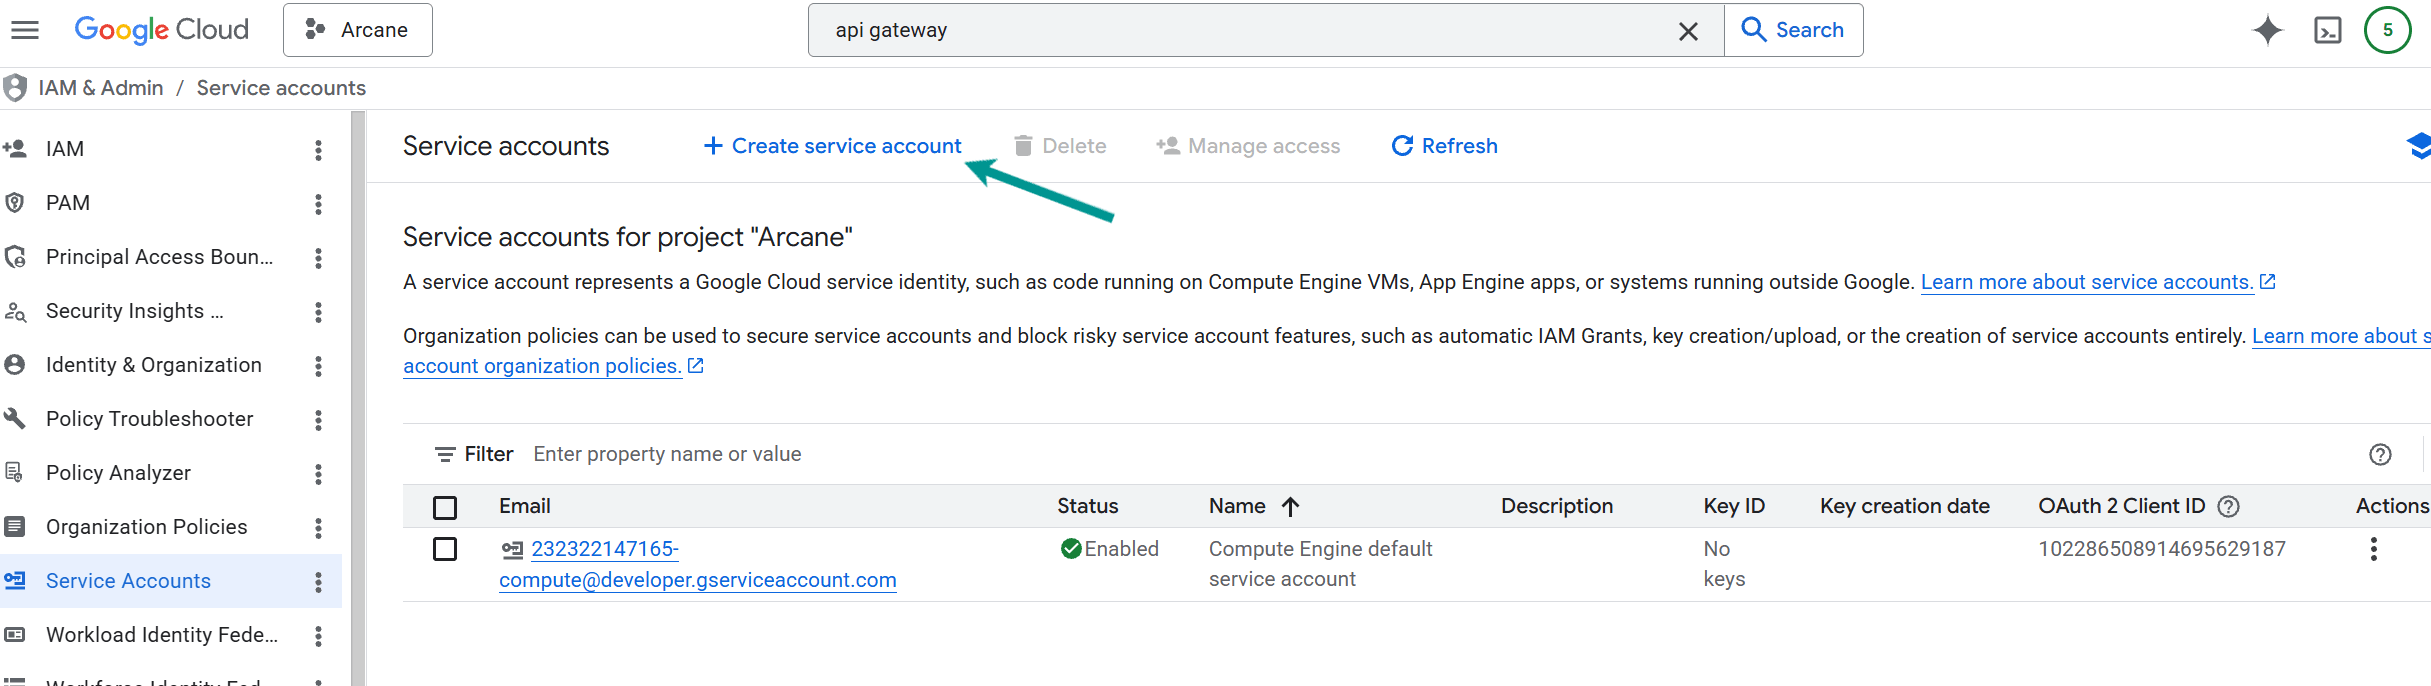
If you create a new one, make sure it has the necessary roles to send API requests to the service you want to test.
To view the "login key" of a service account, click on the service account, then go to the Keys tab.
To create a new key click Add key and select key type JSON.
After generating the key, the JSON file will automatically be downloaded to your computer (this is the only copy!).
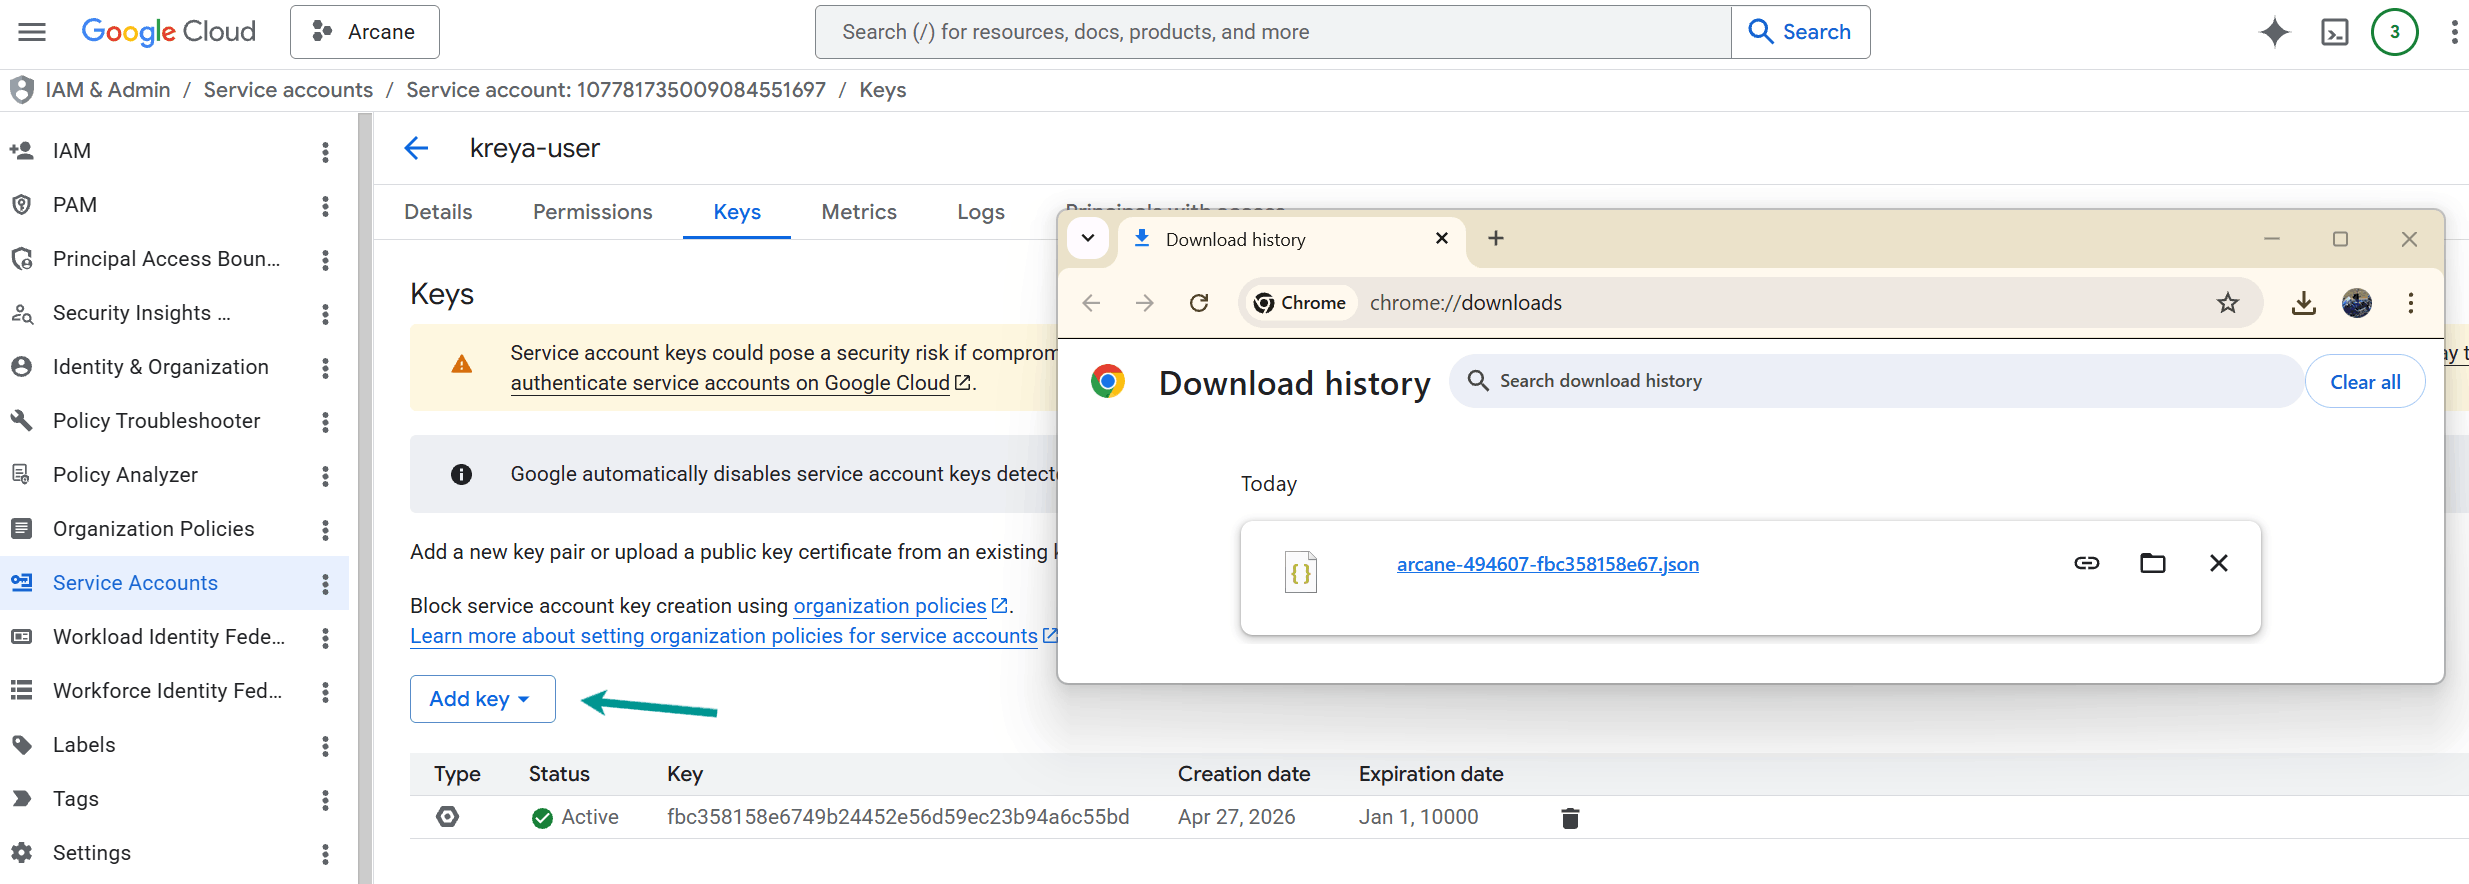
Move this JSON file to a secure location and note the path, as you'll need it to configure the Kreya authentication:
| Property | Value |
|---|---|
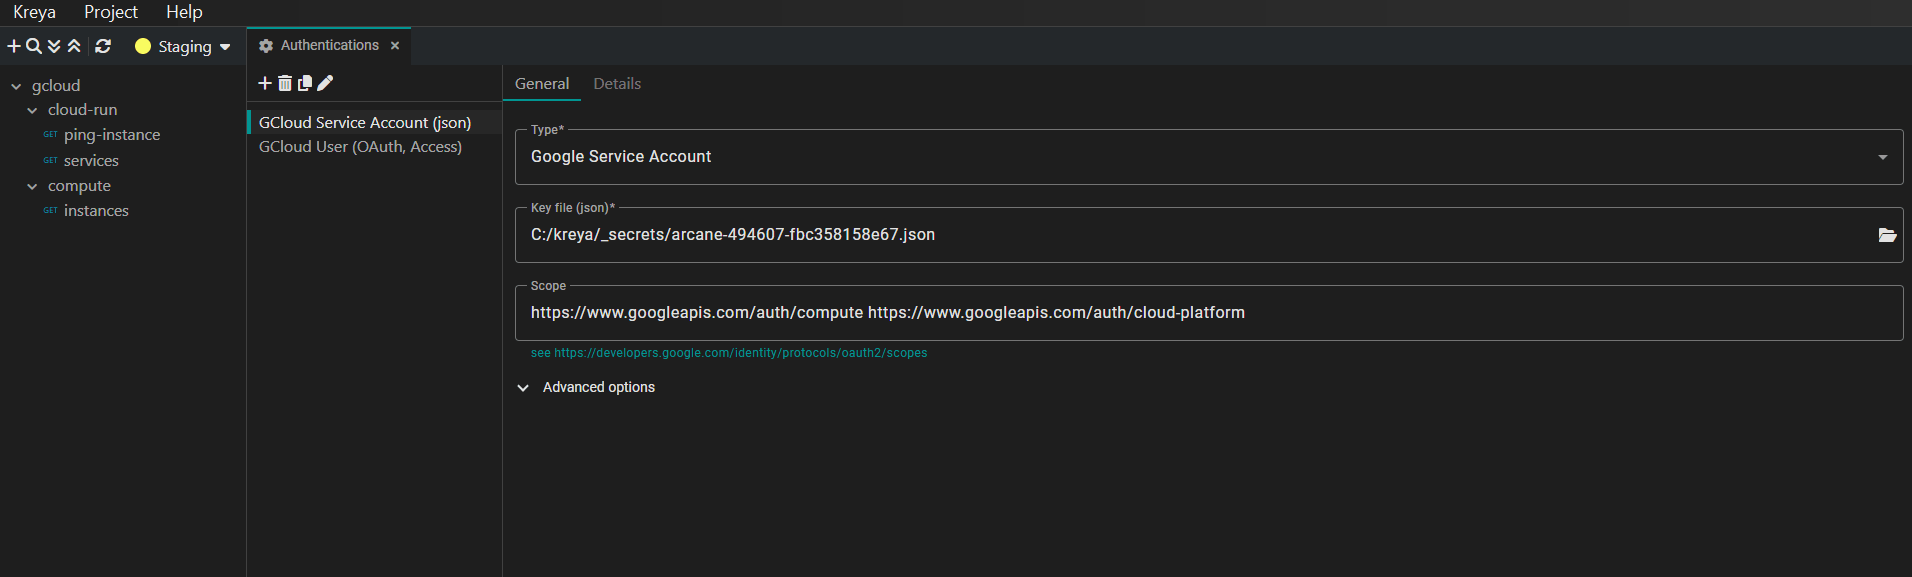
| Type | Google Service Account |
| Key file (json) | PATH_TO_KEY_JSON_FILE |
| Scope | See https://developers.google.com/identity/protocols/oauth2/scopes |
It should look similar to this:
You can use environment variables like {{ env.gcp.keyPath }} to point to your JSON key.
This keeps your project configuration portable and prevents you from hardcoding absolute paths that might differ between team members.
User Authentication (OAuth2 / OpenID-Connect)
If you want to login with a specific user (which has permissions to access the API), you can use the Kreya authentication type
OAuth2 / OpenID-Connect.
You need to setup a OAuth 2.0 Client ID credential in the Google Cloud Console.
If you don't have one yet, navigate to API & Services > Credentials and create one.
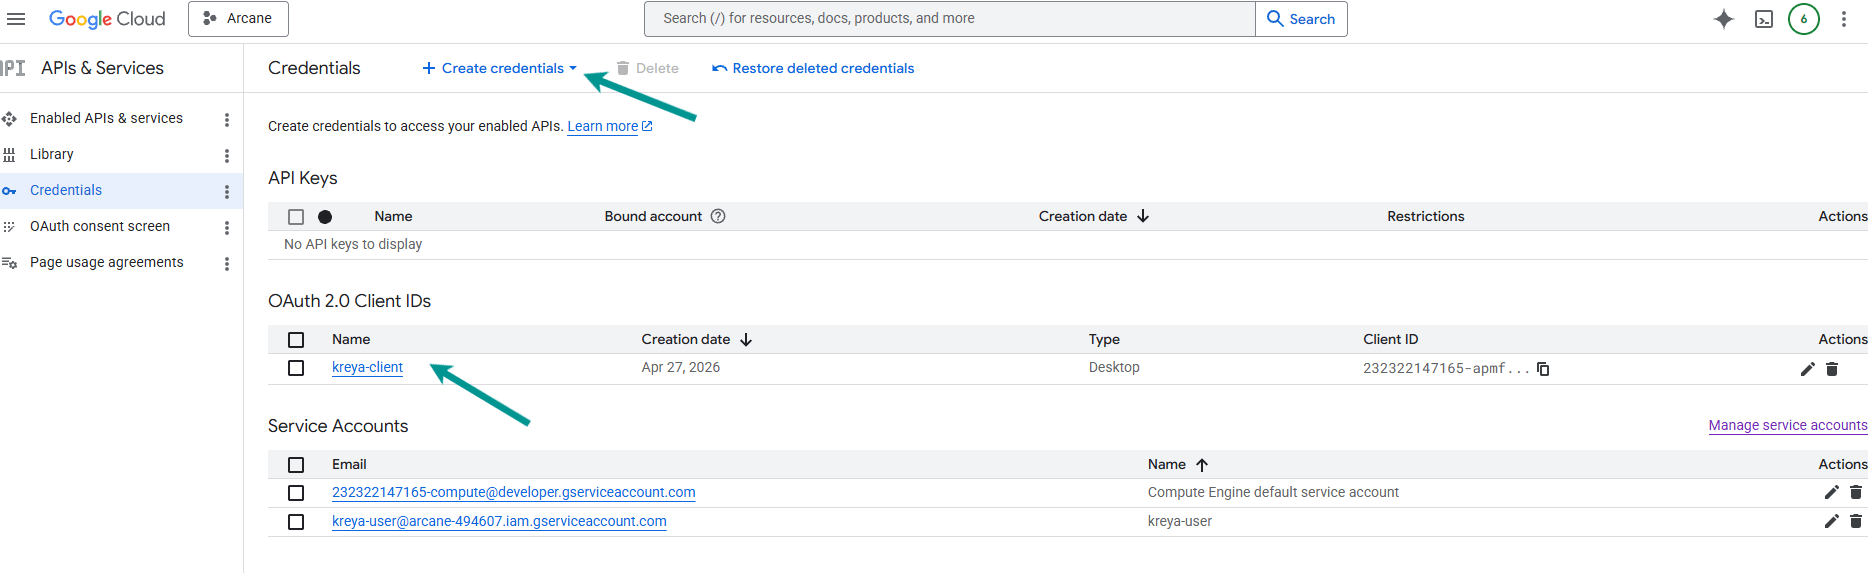
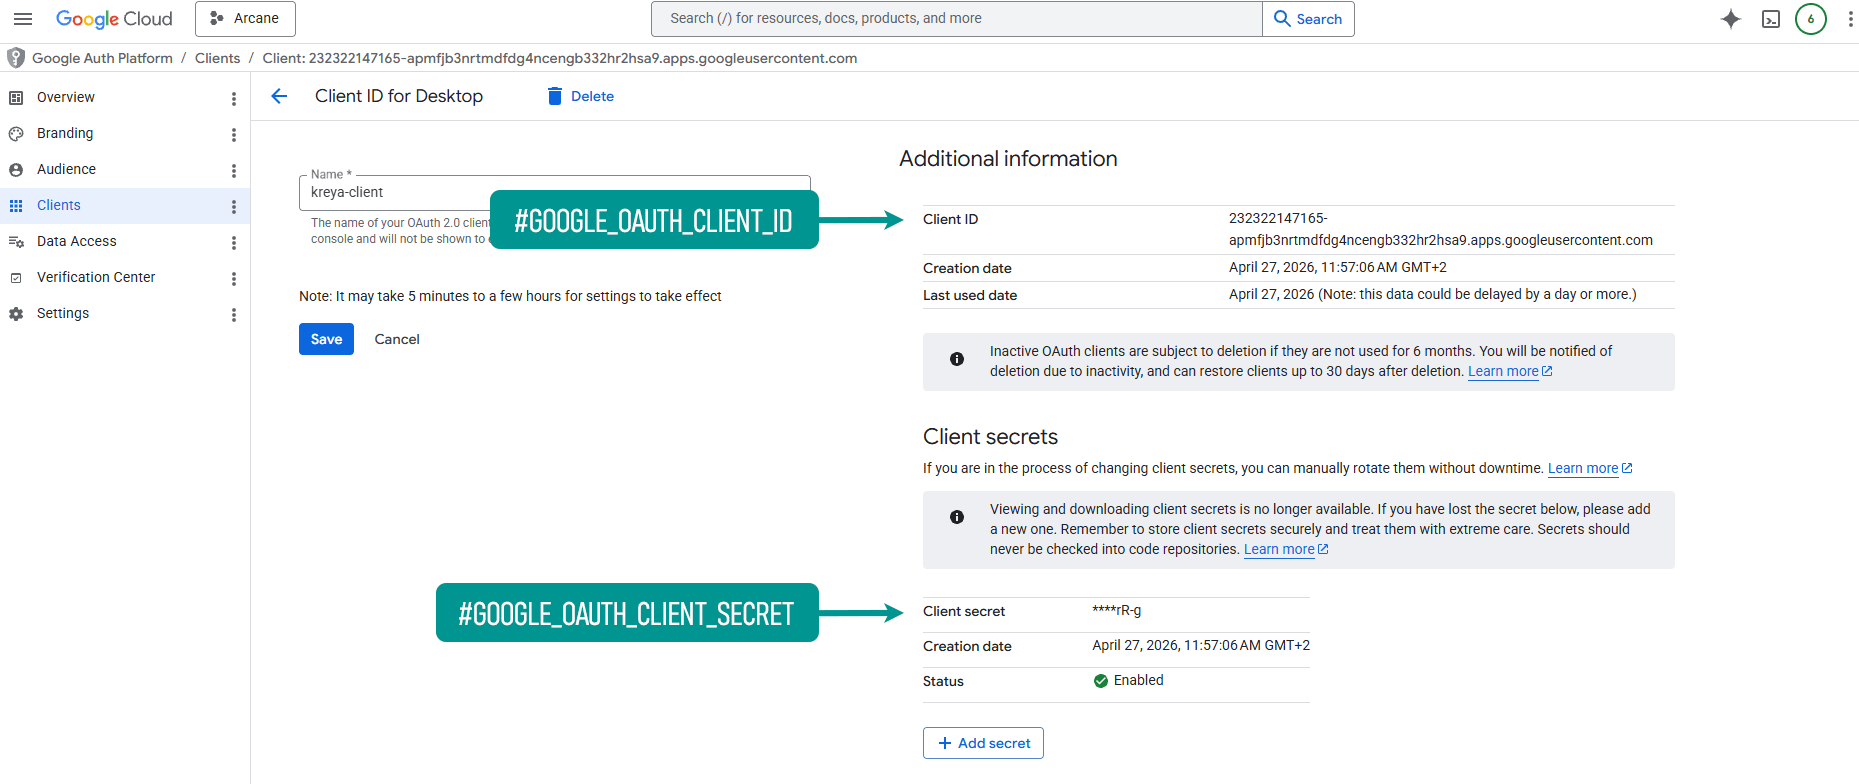
You can find the Client ID and Client secret in the credential details.
The Client secret has to be copied during the credential or secret creation.
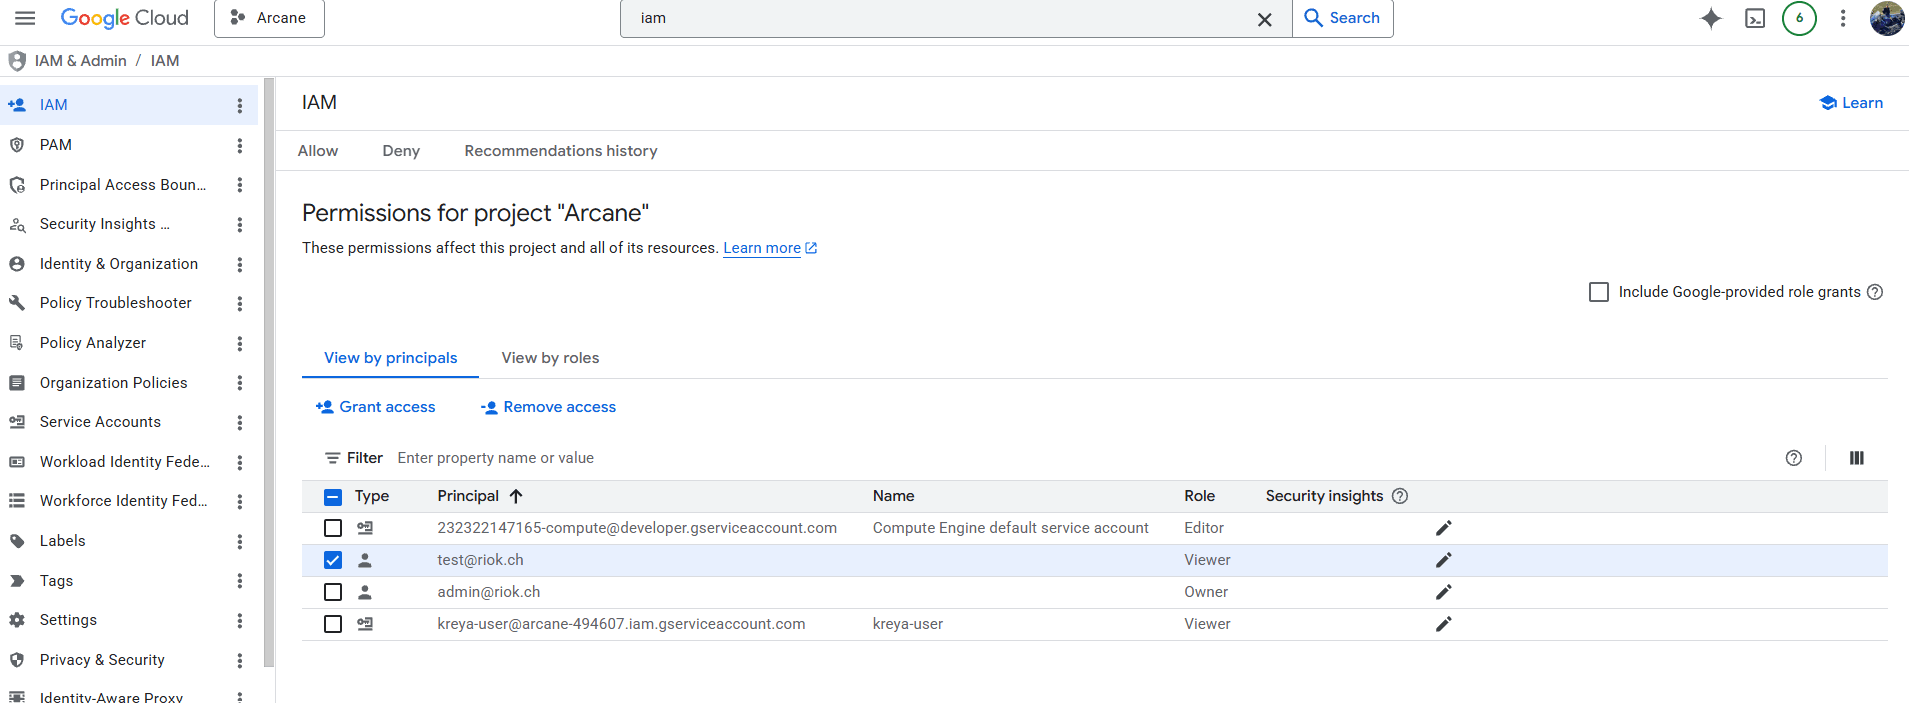
The user which signs in, also needs to have the necessary roles to access the API.
This can be verified in the IAM & Admin > IAM
section of the Google Cloud Console.
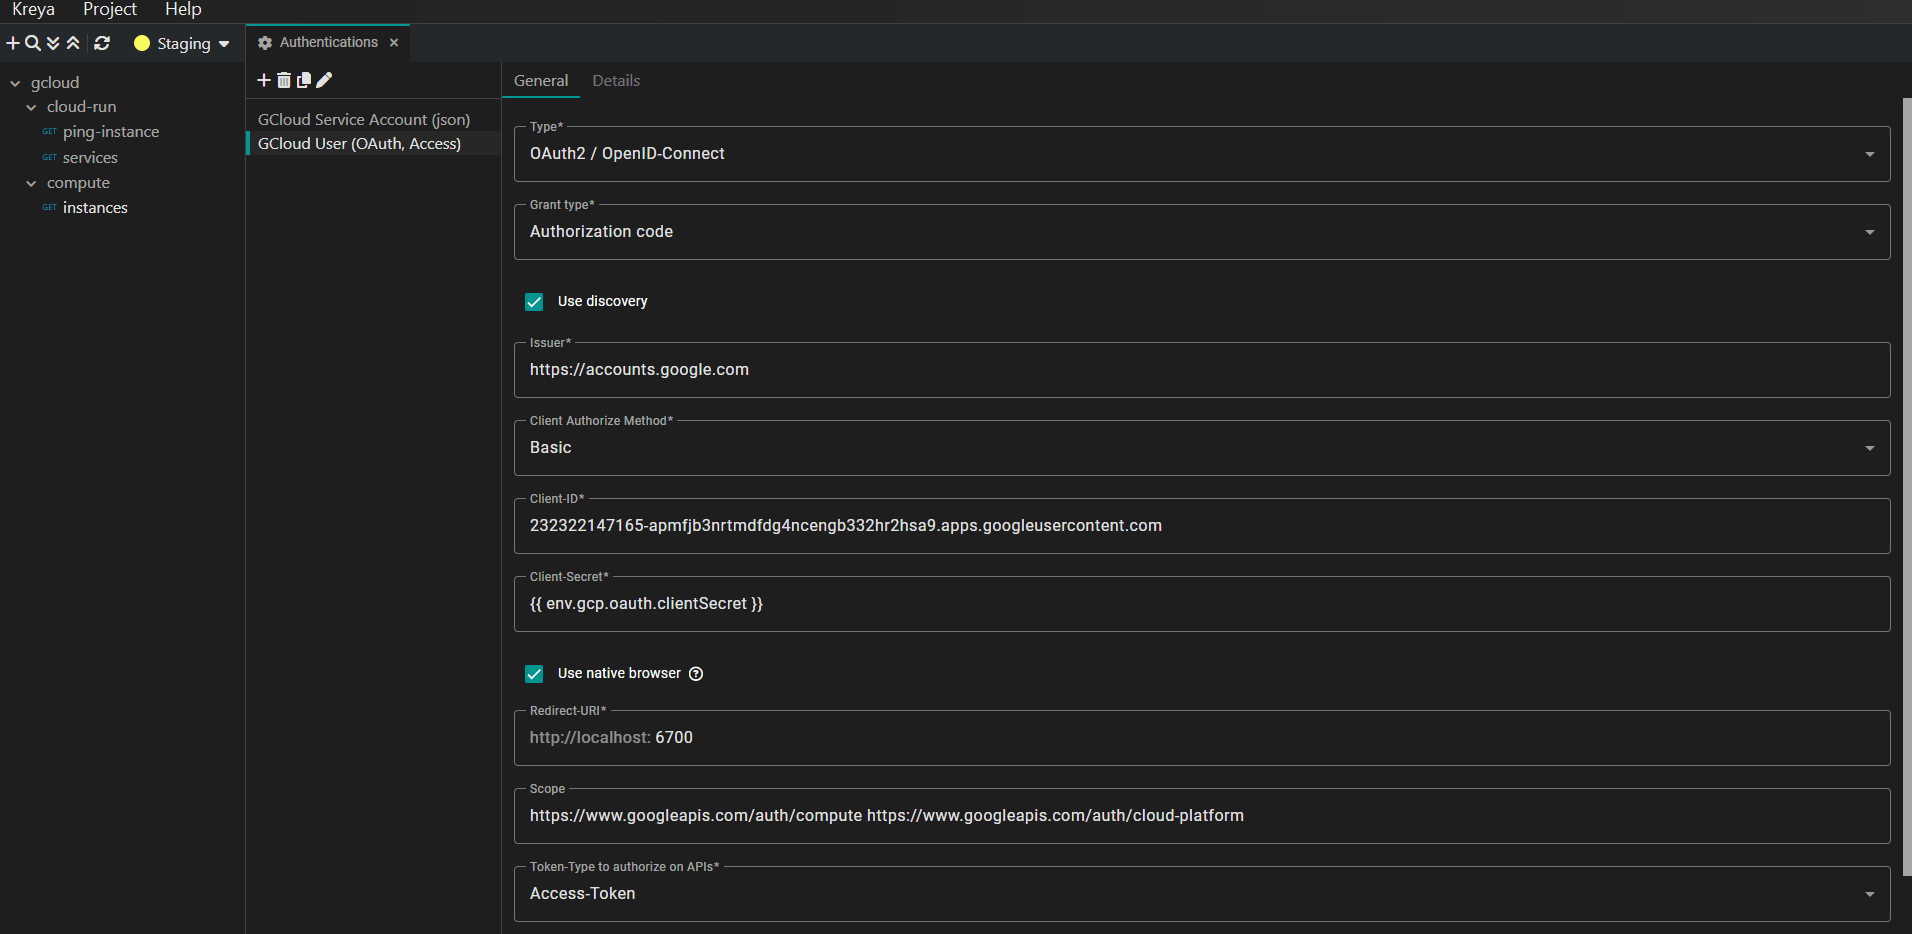
If everything is setup correctly, you can use the following configuration in Kreya to authenticate with Google Cloud:
| Property | Value |
|---|---|
| Type | OAuth2 / OpenID-Connect |
| Grant type | Authorization code |
| Issuer | https://accounts.google.com |
| Client Authorize Method | Basic |
| Client-ID | #GOOGLE_OAUTH_CLIENT_ID (can be found in the Google Auth Platform client info) |
| Client-Secret | #GOOGLE_OAUTH_CLIENT_SECRET (can be found in the Google Auth Platform client info) |
| Use native browser | Check (optional) |
| Scope | See https://developers.google.com/identity/protocols/oauth2/scopes |
| Token-Type to authorize on APIs | Access-Token |
It should look similar to this:
Invoking the request
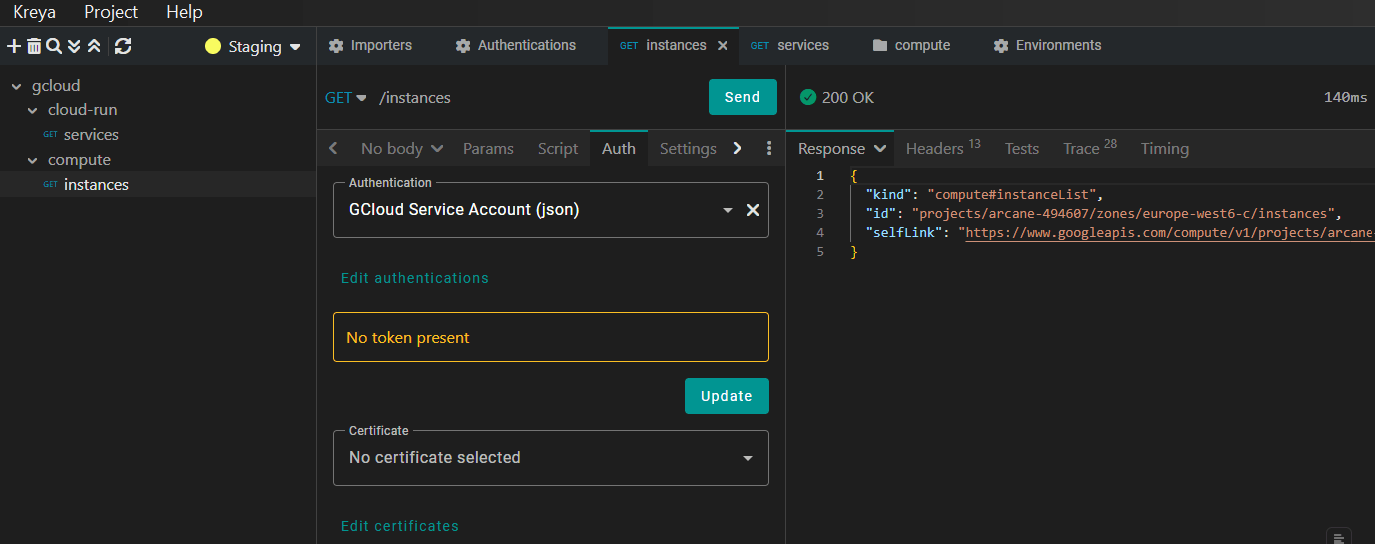
To use your new Google Cloud authentication configuration, go to the Auth tab of your request and select the configuration.

To explicitly fetch a token, click the Update Button.
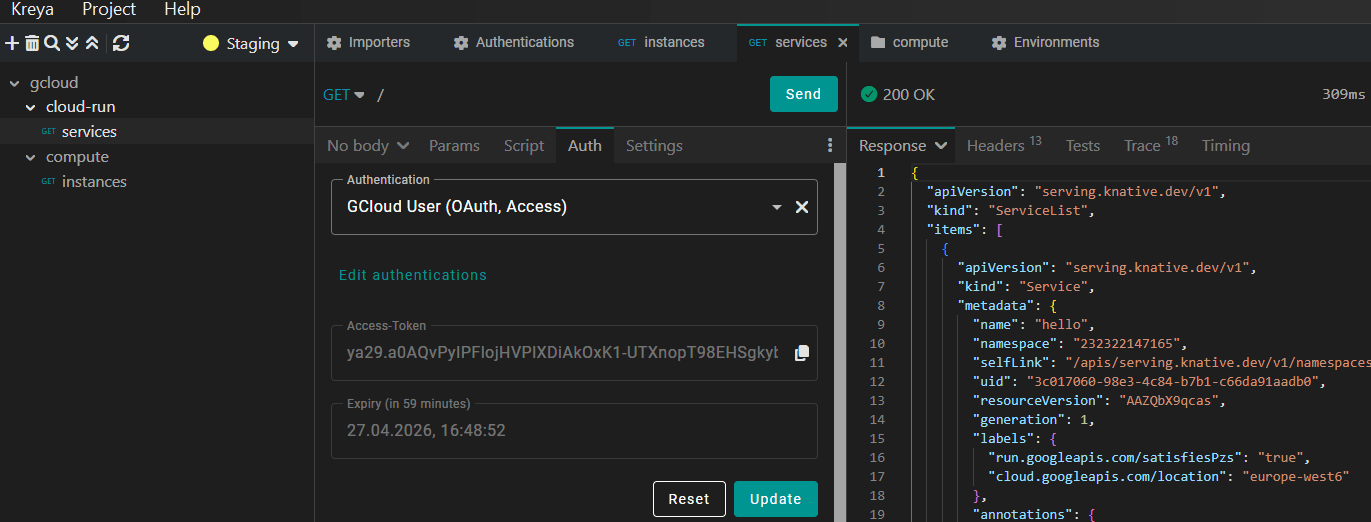
Kreya handles the background communication with Google's authentication servers. If the retrieval is successful, you'll see the token and its expiry date.

Depending on your authentication configuration, it will directly fetch the token or open your browser, where you can login with an authorized user.
If the retrieval is successful, Kreya displays the JWT and its expiry date directly in the UI. You don't need to re-authenticate for every request, Kreya caches the token and automatically includes it in the request.
Examples
In this section, we'll call different Google Cloud APIs using Kreya with the authentication configuration we set up in the previous sections.
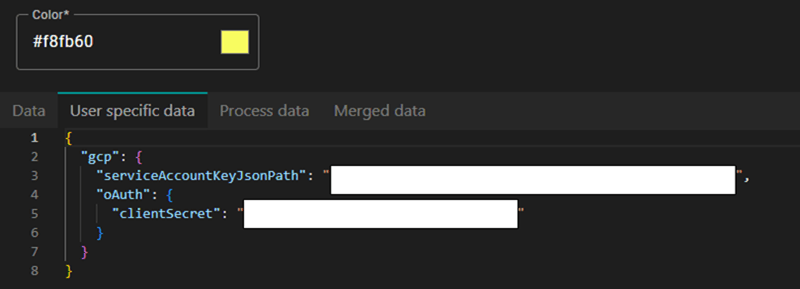
As an improvement, we have moved several Google Cloud values to the Kreya environment variables, so that we can reuse them across multiple requests and easily switch between different Google Cloud projects.
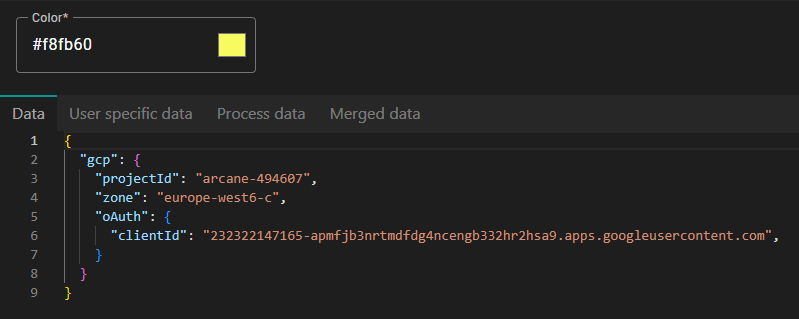
Google Cloud Compute Engine API
Lists all Google Cloud Compute Engine instances of the project.
Endpoint:
https://compute.googleapis.com/compute/v1/projects/{{env.gcp.projectId}}/zones/{{env.gcp.zone}}/instances
Google Cloud Run API
Lists all Google Cloud Run services of the project.
Endpoint:
https://run.googleapis.com/apis/serving.knative.dev/v1/namespaces/{{env.gcp.projectId}}/services
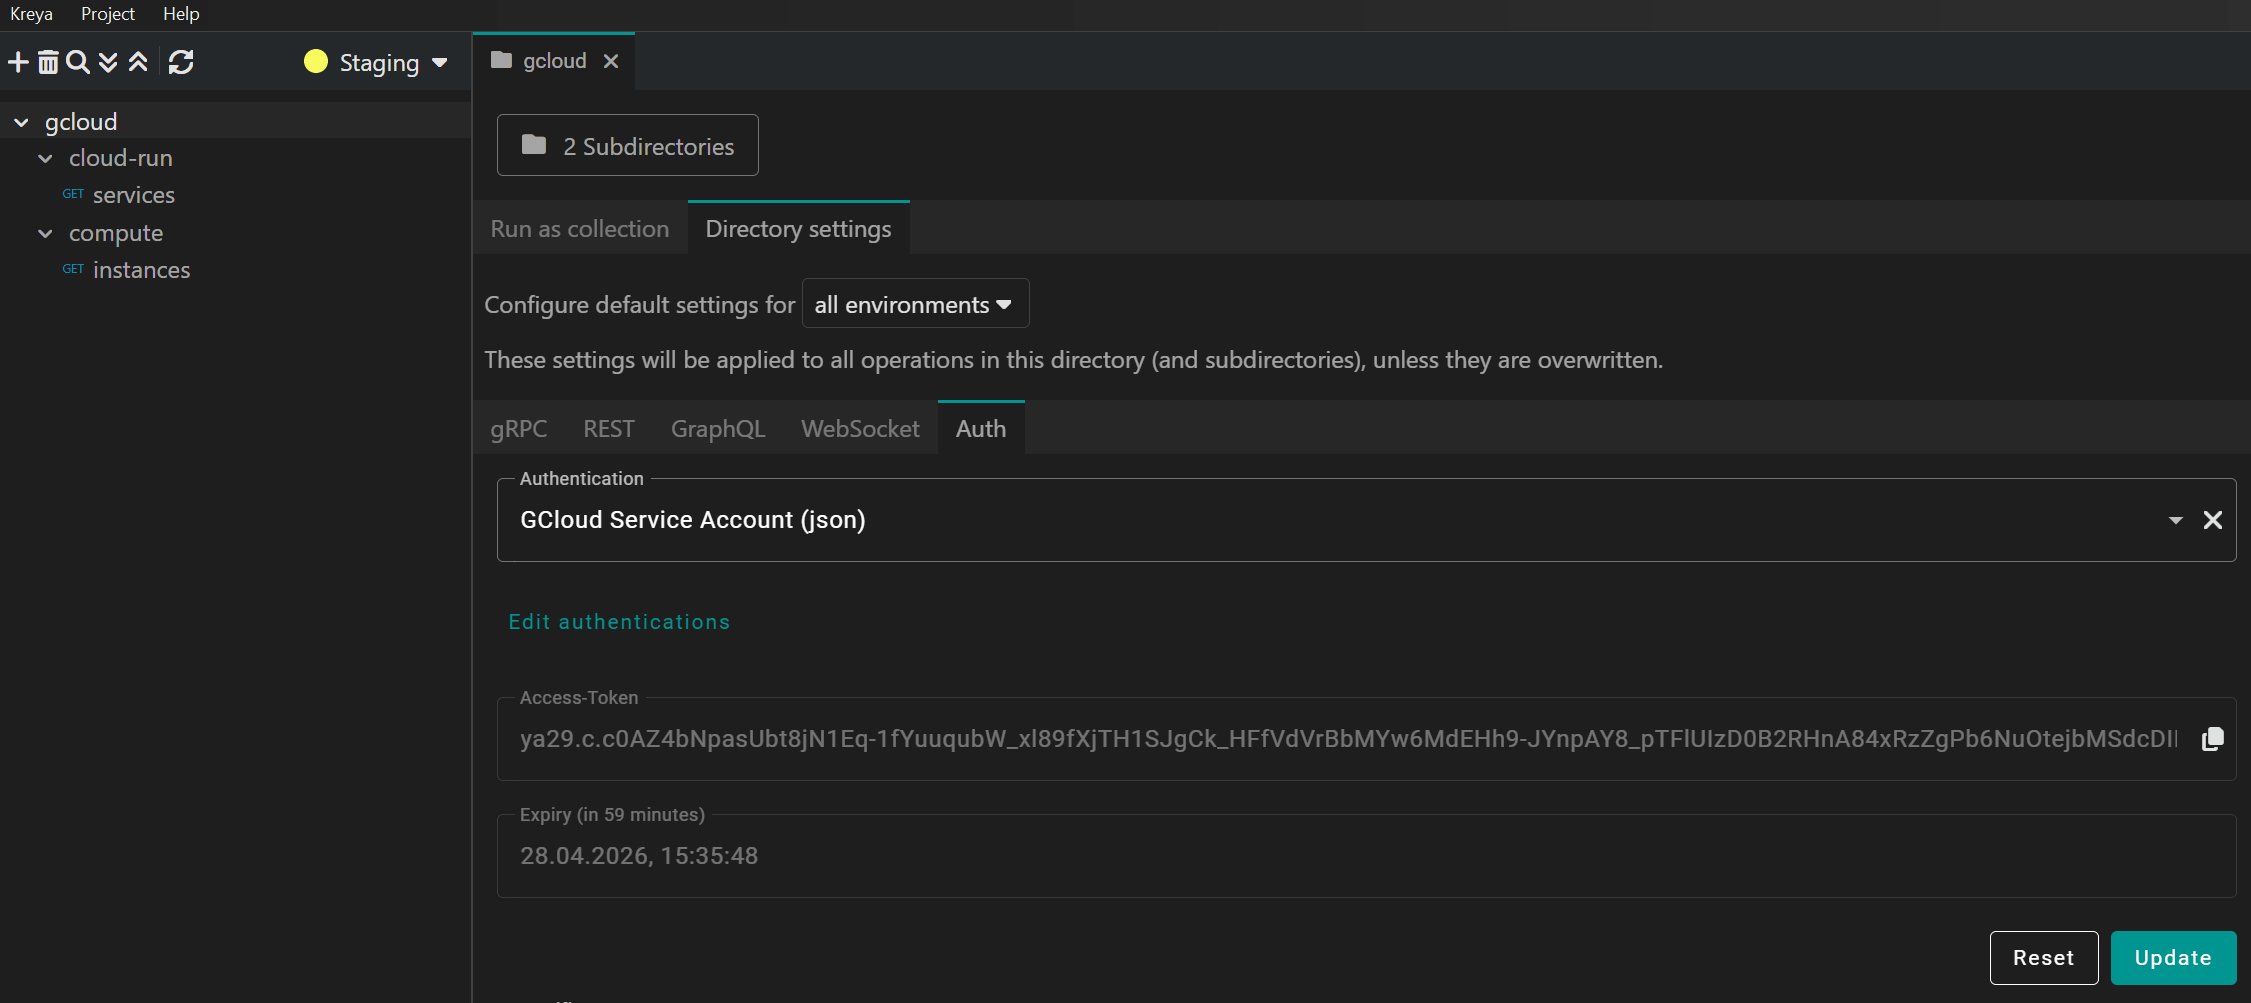
Pro tip: Set the auth per directory settings
Instead of manually assigning the authentication configuration to every single request, you can use Directory settings.
By setting the authentication at the directory level, all requests within that directory and its subdirectories will automatically inherit those credentials.
Conclusion
Testing Google Cloud APIs doesn't have to be a manual burden involving the terminal and copy-pasting long strings.
By using Kreya's native Google Cloud and OAuth support, you can automate token retrieval and focus on building your services.
Whether you're querying the Cloud Storage API or testing Google Cloud Platform backend calls, Kreya's automated token management makes your development workflow significantly smoother.
Ready to try it out? Download Kreya today and start testing your Google Cloud services the easy way.