Testing REST APIs with Kreya

In this post, we will show you how to test your REST API using Kreya. This involves starting with simple status code assertions, progressing to advanced response assertions, and concluding with snapshot testing. Ultimately, we will demonstrate how to automate your tests in your CI/CD pipeline.
Setting up a REST operation with Scripting
Open a REST operation in Kreya. If you don't have a Kreya project yet, or if you don't want to pollute your current one, you can clone our example project from GitHub.
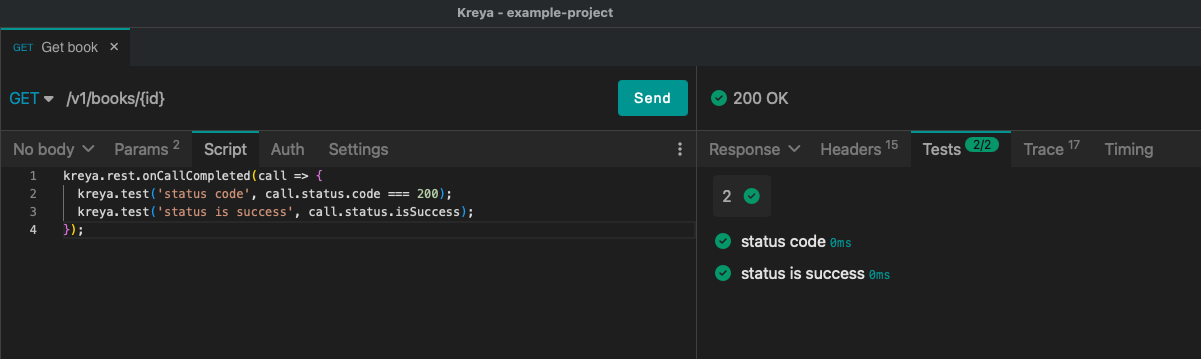
In the Script tab of the operation, you can write JavaScript code to perform assertions on the call.
First, we'll add two simple assertions: one to check the status code, and one to check whether the status is a success.
These tests are placed inside the onCallCompleted hook, which is called after the call has completed.
kreya.rest.onCallCompleted(call => {
  kreya.test('status code', call.status.code === 200);
  kreya.test('status is success', call.status.isSuccess);
});
After sending the operation, you can see the results in the Tests tab.
This is a very basic example, but it shows how you can use Kreya's powerful testing capabilities to validate the response of your API.
Scripting is only available in the Pro plan. Start the 10-day trial to explore this feature!
Advanced response assertions
In addition to basic status codes, you can use advanced assertions to verify the integrity and performance of your API.
For example, use call.headers to check for expected headers or call.durationMillis to ensure your endpoints meet latency requirements.
When inspecting the payload via call.response.content, bear in mind that the system expects it to be in a structured format.
Attempting to access call.response.content when the response content is not valid JSON or YAML will result in an error.
import { expect } from 'chai';

kreya.rest.onCallCompleted(call => {
  // assert headers
  kreya.test('Header Content-Type is json', () => expect(call.headers['Content-Type']).to.eq('application/json; charset=utf-8'));

  // assert response body
  kreya.test('Id in response is set correctly', () => expect(call.response.content.id).to.eq(1));
  kreya.test('Name in response is set correctly', () => expect(call.response.content.name).to.eq('A Tale of Two Cities'));

  // assert latency
  kreya.test('Call should not take longer than 1s', () => expect(call.durationMillis).to.lt(1000));
});
In the docs, you can find more information about General script API or REST script API reference.
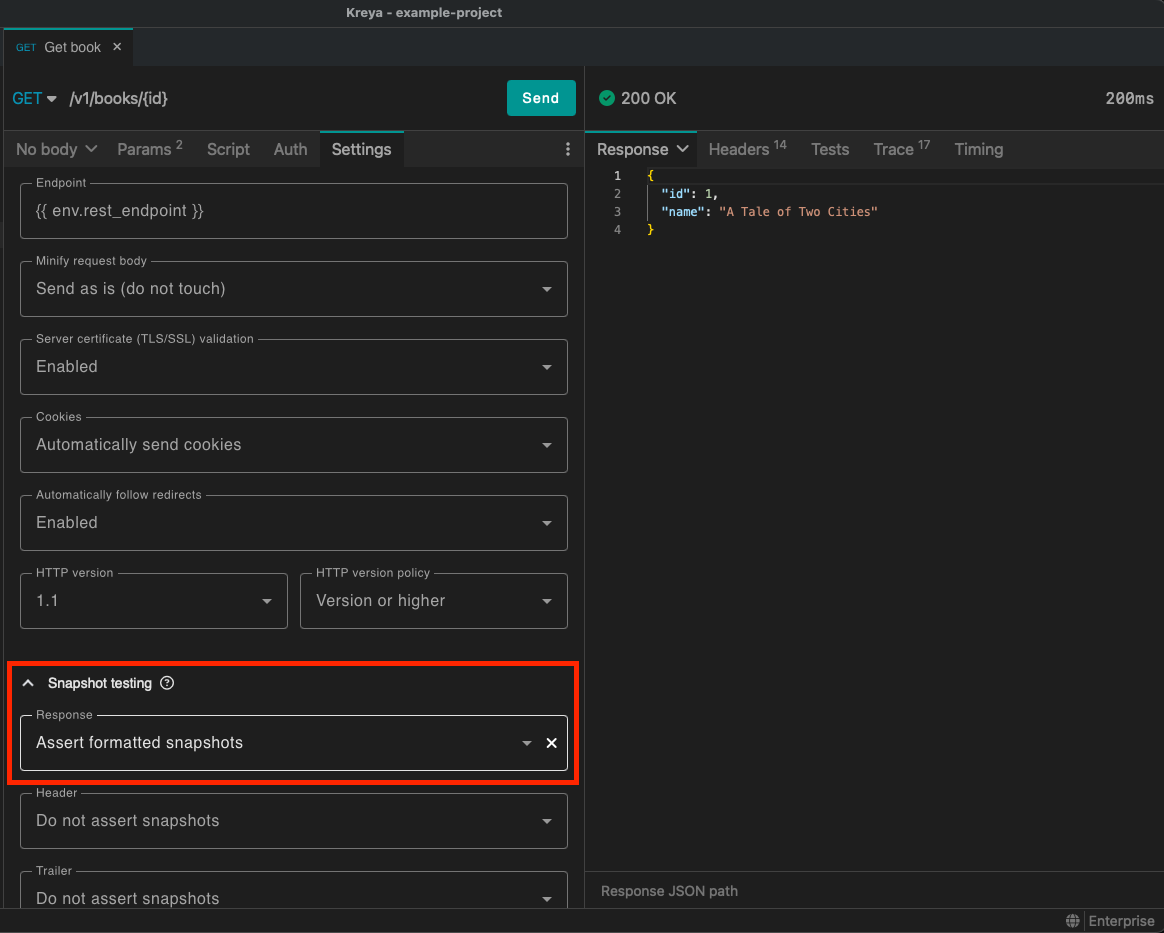
Snapshot testing
Snapshot testing is a powerful tool for testing APIs. It allows you to compare the output of your API with a known good state, ensuring that your API's responses are stable and consistent. For this you can enable snapshot tests in the Settings tab.
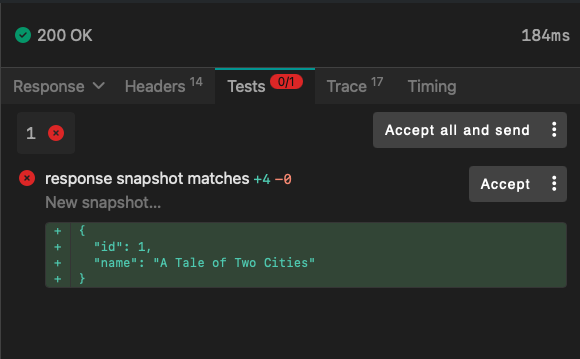
After sending the operation, the test will initially fail since no snapshot currently exists. Then, accept the newly generated snapshot in the Tests tab and send the operation again.
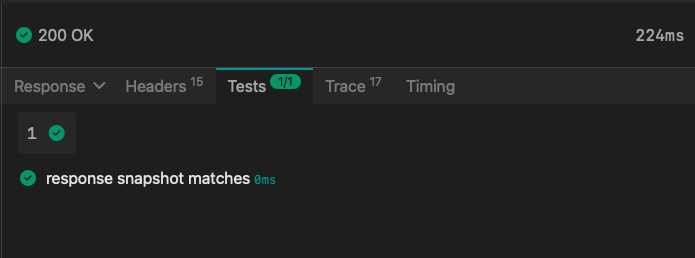
Now, you can see that the test passes. The test will pass as long as the response content matches the snapshot. If the response content changes, the test will fail again, and you have to decide whether this change is expected or not.
Ignoring dynamic data
If your API response contains dynamic data (e.g., a newly generated ID in a create operation), these fields can be ignored / scrubbed from the snapshot.
Built-in scrubbers for UUIDs, timestamps, etc. are enabled by default. However, you can also add custom scrubbers to the snapshot settings.
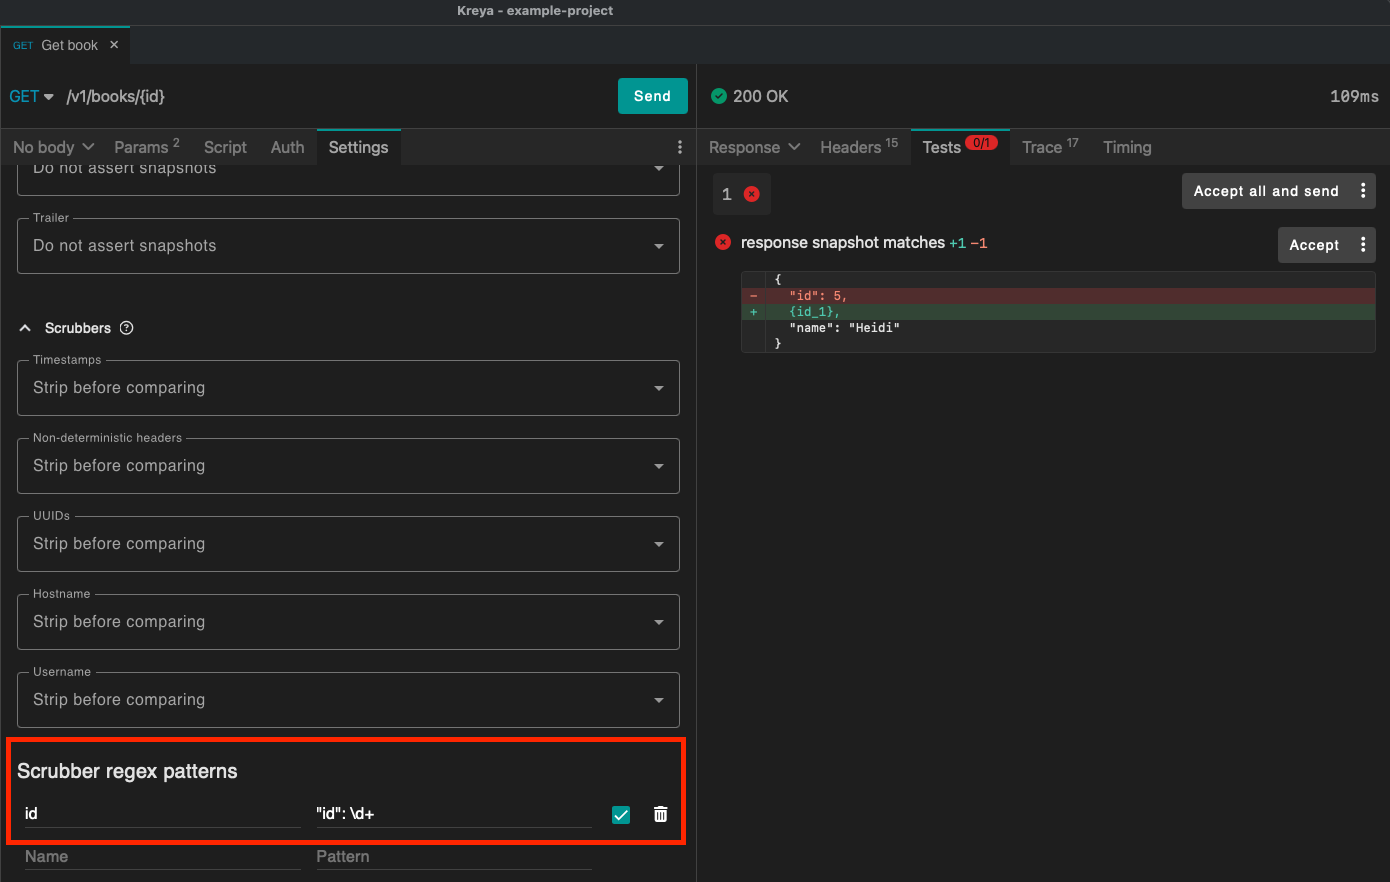
To do this, you need to define a placeholder and a regular expression that matches the data you want to scrub.
In our case, we want to scrub the id attribute. The placeholder is id and the regular expression is "id": \d+.
In the newly generated snapshot, you can see that "id": 5 has been replaced with {id_1}.
For a more detailed explanation of snapshot testing and its pros and cons, check out this blog post.
Snapshot testing is only available in the Pro plan. Start the 10-day trial to explore this feature!
Automated testing with CI/CD pipelines
It is fine to add a script or enable snapshot testing, but you always need to invoke your operation manually. It would be much better to integrate these into a CI/CD pipeline to be able to run tests continuously.
For this, you can use the CLI. This allows you to execute Kreya commands from the command line.
kreyac info # just for debugging purposes: show basic information about kreyac and the project
kreyac environment list # just for debugging purposes: show the environments of the Kreya project
kreyac environment set-active Production # always set the active environment before invoking operations to make sure that the correct one is active
kreyac operation invoke "REST/Get books.krop" # Invoke a single REST operation.
In the Kreya example project, we have a GitHub action which showcases how to use the CLI to invoke some operations with tests.
Closing
This was a quick overview of how to test your REST API with Kreya. If you don't have a subscription yet, you can start a 10-day trial to explore all the above features.